MB7: Sending a Random Image
MAKECODE
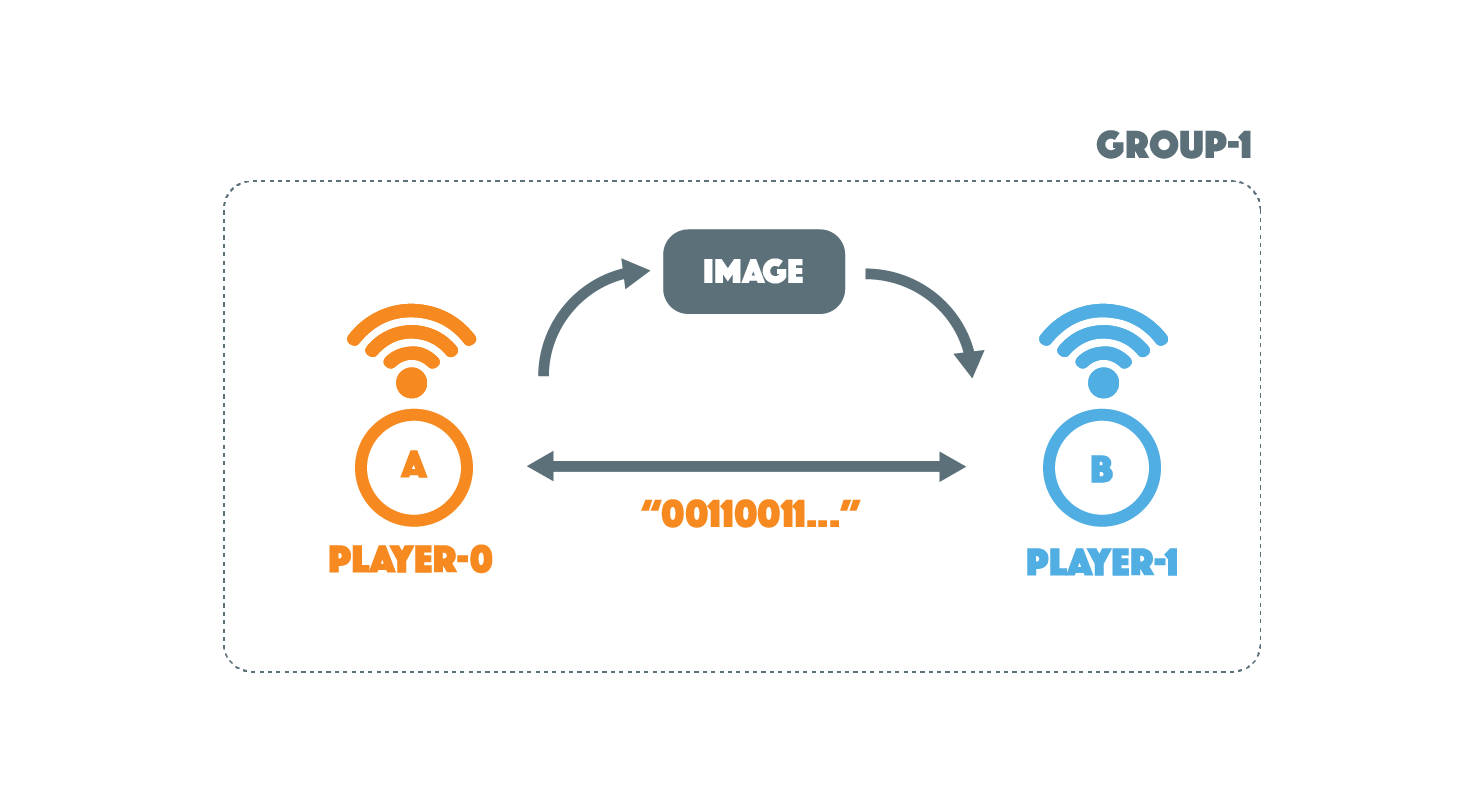
Diagram
Code
Sending the image

On start, a random image will be generated. This is done by choosing a random LED to turn aon nd repeating this 25 times. The String variable encodeImage is created which will be used to store the on/off status of every single one of the 25 LEDs found on the micro:bit. The on/off status of each LED will be given a coresponding numerical value. An LED that is on has a value of 1, while an LED that is off has a value of 0.
The first number that appears in the encodeImage string will represent the first LED, the second number will represent the second LED and so on. Therefore, given the following String: "10101010...", the first LED would be on while the second ould be off and each subsequent light would follow the same pattern.
Two additional variables x and y are used to locate the specific locations of LEDs found on the 5x5 microbit grid. x represents the horizontal axis while y is the vertical axis. The top left LED would therefore have a coordinates of x = 0 and y = 0 while the center LED would have x = 2 and y = 2.
*Note: On the micro:bit makecode website, it is possible to hover over an LED on the micro:Bit simulator and see its (x,y) coordinate location.
The B button will allow the player to select a random image of their choosing. Each time the button is pressed random LEDs will be turned on to create a pattern.
Using the A button, the random image created will be sent to another micro:bit by sending whether each LED is on or off. To determine the on/off status of each LED a loop is place inside of another loop. Starting at the top left LED (x = 0, y = 0), a loop is created to go through every possible x position where an LED could be (x = 0, x = 1, x = 2, ... ). If this was the only loop used, it would only be possible to check whether LEDs in the top row of the micro:bit were on or off, since only the x coordinate is changing ((0,0) , (1,0) , (2,0) ... ).
In order to check all 25 LEDs, inside of this first x loop a second loop is placed that accounts for the vertical coordinates. Now while x = 0, every y value will be checked, making it possible to verify every LED in the first column ( (0,0) , (0,1) , (0,2)...) before moving on to the second column where x = 1. Then, while x = 1, every y value will be checked again ((1,0) , (1,1) , (1,2)...) and so on until the on/off status of all 25 LEDs is verified. Everytime an LED is determined to have a value of 0 or 1, that number is added to the String encodeImage.
Due to the limitations of the micro:bit only Strings containing 19 characters or less can be passed via radio. In order to send the on/off status of all 25 LEDs the String must be broken up into two substrings. One substring will contain the first 15 0s or 1s representing whether an LED is on or off, while the second will contain the remaining numbers.
Code available here
Receiving the image
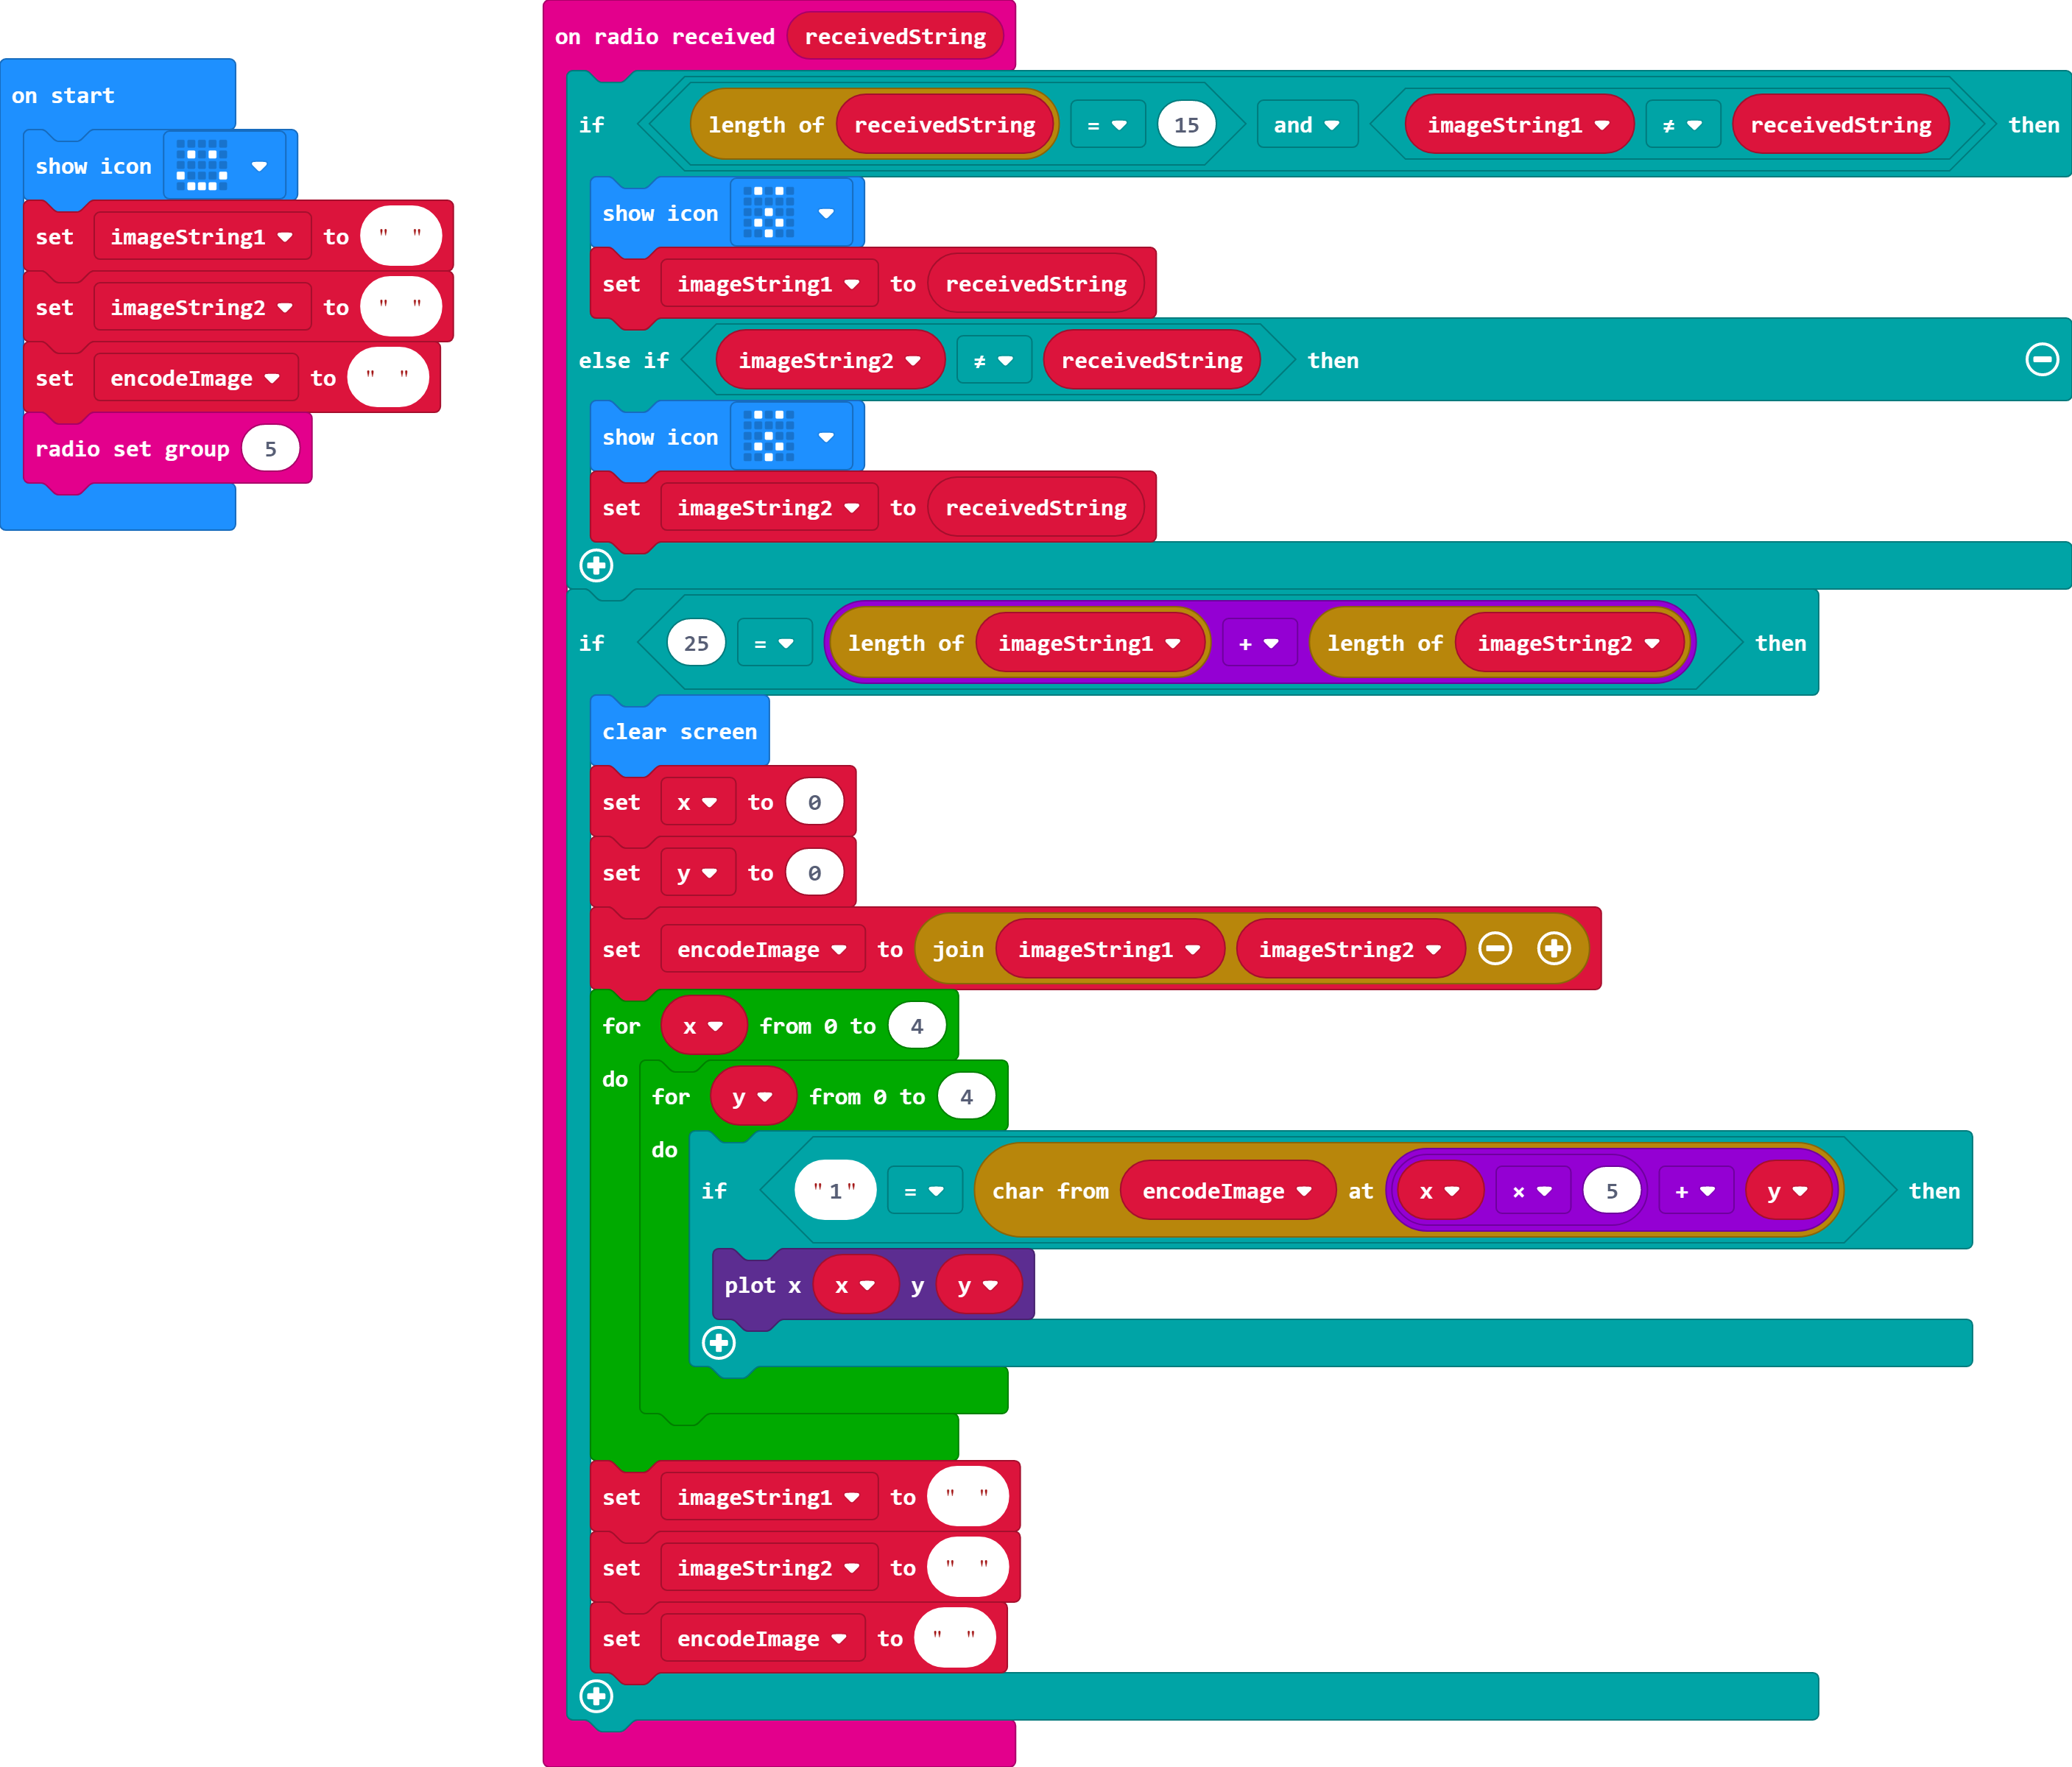
On start, three variables are created to receive the sent image. imageString1 and imageString2 are for receiving the two pieces of the String message describing the on/off states of each LED while encodeImage is for the completed image.
When the micro:bit receives a String, it will check if the received String is the same as the Strings stored in imageString1 and imageString2. If the received String is different it will update the String with the newly received String. To ensure that the right Strings are stored in the right variables, the String of length 15 is always made to be imageString1 and the other received String becomes imageString2.
Once the length of both Strings is 25 when added together, the LEDs will be lit up based on what order the received String contains 0s or 1s. A loop is placed inside of another loop to be able to go to every possible x and y coordinate (as explained in Encoder). The if statement contained in the loops will check if there is a 0 or a 1 and turn the LED on accordingly. Once the LEDs are light up in the same pattern that was received, the three variables are set back to being empty in order to receive another message.
Code available here
Game

Secret Message | 2 or more players | 1 micro:bit per player
Players each start with one micro:bit each, one loaded with the Encoder and one loaded with the Decoder. Players can spend time choosing their secret image using B button. Then they can press A to send their image to their friend.
ARTBIT
Diagram